It sees it all: family dinners, speedy breakfasts, holiday baking marathons, and snack breaks galore. Naturally, your kitchen cabinets bear the brunt of all this action. With time, grease, grime, and spills will have built up, and your cabinets may not be looking their best. Cleaning them might seem overwhelming, but with the right approach and products, it can be fairly straightforward.
RTA, a family-owned business of home DIY solutions, knows just the perfect balance between practicality and quality. To those of you renovating your houses or to those contractors out there who like their work to speak for them, here’s a guide to get you some beautiful, lasting results.
Why Clean Cabinets Matter
The thing with clean cabinets is that, aside from looking good, it prolongs the life of your cabinetry. Accumulation of dirt and grease can break down finishes and loosen hinges over time. That is something nobody wants to deal with: expensive repairs or replacements. Regular cleaning safeguards your investment and keeps your kitchen fresh and welcoming.
Supplies You’ll Need
First things first, get all your supplies to make this process seamless. Here’s what I suggest you use:
- Mild dish soap or wood-safe cleaner
- White vinegar for natural cleaning
- Warm water
- Soft microfiber cloths or sponges
- A small bucket or bowl
- An old toothbrush or soft-bristle brush
- Dry towels
- Wood polish or conditioner to use on wood cabinets, if desired
Step 1: Prepare Your Kitchen
Take everything out of the cabinets to give yourself nice, open spaces to clean. Now’s a good time to dispose of items you no longer need or sort through other items, such as expired pantry goods.
Next, cover your countertops and floors with a towel or drop cloth to catch drips and protect your surfaces.
Step 2: Dust and Vacuum
Before adding liquid to the equation, take out the dust and loose debris. The inside and outside of the cabinets are best cleaned with a soft, dry cloth or a vacuum with a brush attachment. Pay special attention to corners and hinges, where crumbs and dust like to hide.
Step 3: Tackle Grease and Grime
Kitchen cabinets tend to accumulate a greasy buildup and dust that hardens into an impenetrable layer. Here’s how to handle it:
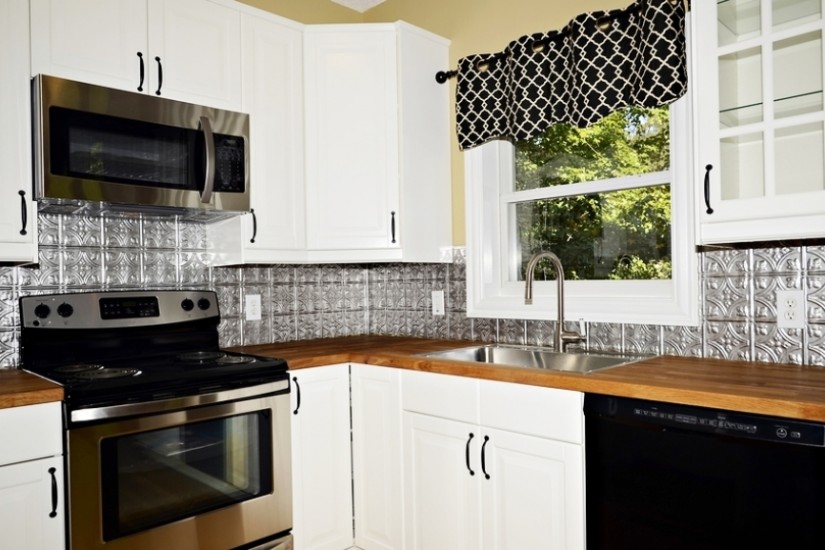
For Painted or Laminate Cabinets
Mix a solution of warm water and mild dish soap. Use about a teaspoon of soap per quart of water. Dip a microfiber cloth or sponge in the solution and wring it well before wiping down surfaces—work in small sections, focusing on high-touch areas like handles and edges. Use an old toothbrush or soft-bristle brush to bring a soapy solution onto stubborn spots.
For Wood Cabinets
Mix a wood-safe cleaner or equal amounts of vinegar and water as a substitute. Add a few drops of mild dish soap to increase cleaning power. Don’t soak the wood; lightly dampen your cloth and proceed to clean the surface. This helps to avoid too much moisture over time, which could compromise finishes on wood. Take a clean, moist cloth and wipe off soap residue, then dry right away with a towel to prevent water spots.
Step 4: Clean the Hardware
Cabinet hardware tends to collect fingerprints, grease, and grime. If possible, take knobs, handles, and hinges off for a proper clean. Soak them in warm, soapy water, scrubbing with a toothbrush if necessary. When they can’t be removed, clean them in their place using the same soapy solution of water. Dry well so that water spots or rust won’t show.
Step 5: Tackle the Tough Stains
If some stains resist your preliminary cleaning, no problem. For those, apply these methods specifically:
Grease Build-Up: Use a small amount of baking soda paste, which is baking soda mixed with water on top. Gently scrub using a soft cloth or brush, then wipe clean.
Sticky Residue: Rubbing alcohol on a soft cloth will dissolve adhesives from old labels or spills. First, test in an inconspicuous spot.
Water Stains: Buff with a mixture of olive oil and vinegar, then wipe clean.
Step 6: Polish and Protect
Once your cabinets are clean and dry, consider the finishing touch. For wood cabinets, apply a quality wood polish or conditioner to restore the luster and provide further protection. For painted or laminate surfaces, a simple buff with a dry microfiber cloth enhances the shine.
Step 7: Replace Liners and Restock
If you have shelf liners, take them out and replace them if they’re worn. Stock your cabinets back up thoughtfully, wiping items down as you go to avoid re-introducing dirt or grease.
Maintenance Tips for Long-Term Care
Keeping your cabinets clean doesn’t have to be a major chore. With regular upkeep, you can maintain their beauty and functionality with minimal effort:
Wipe Spills Immediately: Address spills and splatters as they happen to prevent staining.
Weekly Dusting: A quick swipe with a dry cloth every week keeps the dust and debris at bay.
Deep Cleaning Every Month: Take out some time once a month to clean those high-touch areas and grease accumulation.
Use Ventilation: Keep the range hood on while cooking, thereby reducing grease and steam exposure to your wall surfaces.
Choosing the Right Cleaning Products Not all cleaning products are created equal, and some can damage your cabinets. Stick to gentle, non-abrasive cleaners designed for your cabinet material. Harsh chemicals, bleach, and abrasive pads can strip finishes and cause discoloration.
If you’re unsure about a product, test it in a hidden area before applying it widely.
Troubleshooting Common Issues
Even with the best intentions, cleaning projects sometimes reveal unexpected problems. Here’s how to handle them:
Peeling Paint or Laminate: Keep the area free from moisture until professional repairs can be made.
Warped Wood: Search for water damage or leaks; eliminate the source of the moisture. Refinish as necessary.
Persistent Odors: Leave a bowl of baking soda or activated charcoal in your cabinets to absorb odors.
The Reward of Clean Cabinets
A clean kitchen isn’t just about the looks; it is a functional space where one will enjoy cooking, entertaining, and spending time with the family. Paying special attention to your cabinets means protecting one of the most hardworking parts of the home.
At RTA, we’re passionate about helping homeowners and contractors create spaces they love. Whether you’re looking for high-quality cleaning products, expert advice, or durable cabinetry solutions, we’re here to support your journey every step of the way.
Did you know that all cabinetry is currently 55% off? What a way to start the new year!
Sign up for our email list today and unlock exclusive home design deals you won’t find anywhere else. Oh, and there’s the added freebie of our room design tool to help unleash your DIY design genius in the creation of a designer dream kitchen. So don’t wait any longer; let’s make your home makeover exciting, stylish, and on a budget!