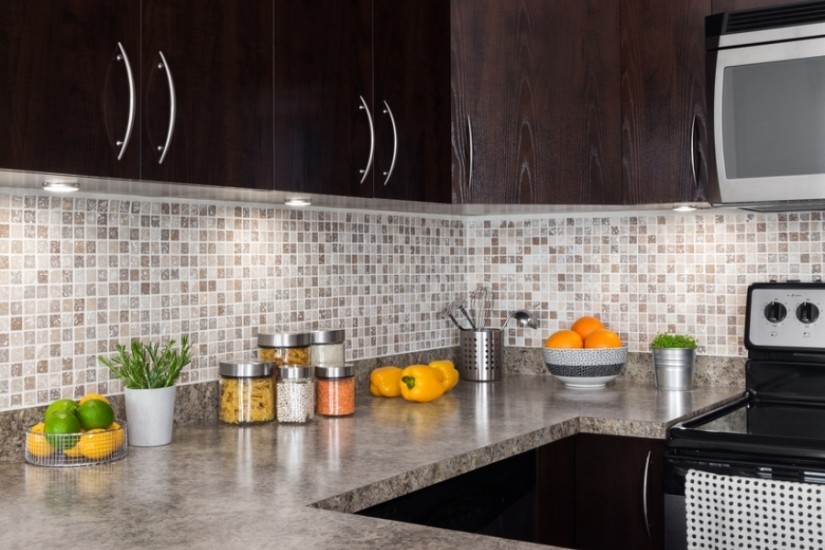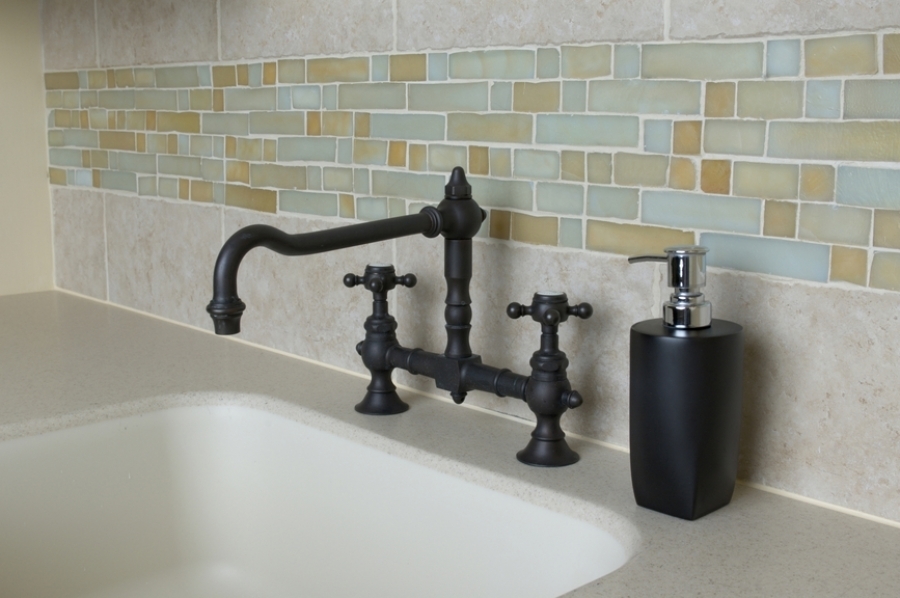
With recycled tile you can mix different colors and textures to create a unique backsplash that is also eco-friendly. We love the look of recycled glass tile—which is the result of melting down raw glass from bottles and adding color.
Despite the extra steps needed during installation to ensure marks don’t show through the clear tile, the finished product is beautiful and worth the extra time. Check out these steps on how to install your very own recycled tile backsplash.
Step 1.
Figure out the pattern you are going to use by laying out the tile beforehand. With a recycled tile backsplash there are many different layouts possible. You could do something more decorative by creating an inlay within an inlay, or if you are working with rectangular tile you could go with a herringbone pattern.
Diamond shaped designs and brick patterns are two other backsplash layouts that tend to be a bit simpler. Create a grid or a test board on a flat surface using the actual measurements of the area you will cover and let that serve as a mockup of your backsplash.
Step 2.
Since glass is non-absorbent you will want to use a latex variety of thin-set that won’t shrink down or become unfixed. Apply thin-set adhesive to the wall with the flat side of your trowel. Only cover the area that you feel you can tile within a few minutes, because if you apply more than that your adhesive will begin to dry.
Then go over the thin-set with the square notch side of your trowel—this will make sure the thin-set is even and the right thickness. Finally, go over the adhesive once more with the flat side of the trowel to smooth out the grid marks. If you skip this step you will see the grid lines through the clear tile. You want to do this very carefully so that the thickness is not compromised but all marks are smoothed out.
Step 3.
Wipe down all tiles before gluing to the wall. This is a good step to include when installing a recycled tile backsplash because unlike your standard stone tile, the clear glass will show any debris that may get stuck between the tile and wall.
Once clean, apply thin-set directly to the back of tile and apply tile to the wall following your pattern. Use spacers to keep lines uniform. Once you have applied all of the tiles, allow time to set before applying grout.
Step 4.
Apply grout using a float. For the best application, hold your float at a 45-degree angle and stroke the surface in different directions so that the lines are completely and evenly filled. Once you have allowed time to dry, wipe over the tiled surface with a sponge and clear water to remove any adhesive or grout that has stuck to the tile. You may need to clean off the tile surface more than once depending on how much product has spilled over.
Have you installed your own recycled tile backsplash? Leave us a comment and share a few tips with us!