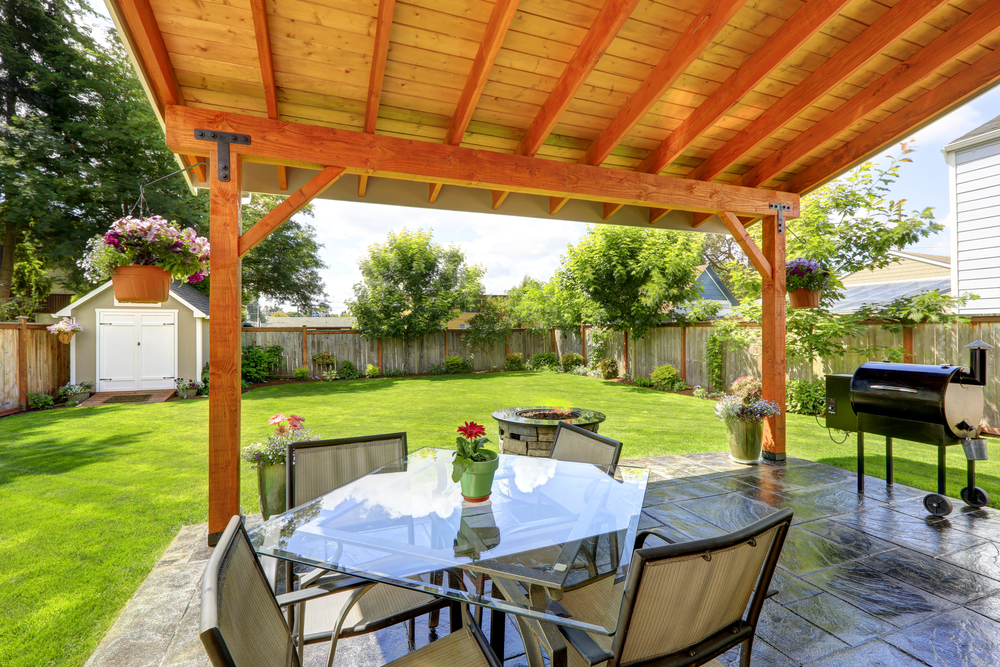
The lure of your backyard is stronger than ever in summer. Sunny skies, warm weather, and lots of reasons to celebrate make spending time outside wonderful. But not all of us have a pool to cool off in or an area properly set up for entertaining. A pergola is a great backyard addition, as it adds a designated spot for relaxing and a convenient location to install outdoor kitchen cabinets. The best part? You can build one yourself!
Step 1: Pick a spot and prep the area
Find an area perfect for building your pergola — Not too close to your fence or home, and preferably near some trees for extra shade. You’ll also want a space with flat ground that can comfortably accommodate your structure (which will be 6’ x 8’ with about an extra foot of overlay). To make sure you’re not going to disturb any lines, call your utility and cable company to come to your home and mark where their services run in your backyard.
Step 2: Gather tools
You may already have some of the tools needed to build a pergola, like a drill, hammer, and measuring tape. You’ll also need a few different saws (circular, saber and reciprocating), a wheelbarrow, caulk gun, power auger, drill, carpenter’s square, 3-foot level, and shovel.
Step 3: Purchase materials
A 6’ x 8’ pergola should offer plenty of room to install outdoor kitchen cabinets, and set up a sitting area. Here is a list of materials you’ll need to purchase:
- 4 (2×8 x12’) pressure treated beams
- 4 (4×4 x 8’) and 9 (8’ x 2×8) pressure treated boards
- Pressure treated beam ties
- Construction adhesive
- Galvanized steel angle brackets
- Deck screws
- Ready-mixed concrete
- Driving bits
Step 4: Dig out holes for posts
Your power auger or shovel will assist you in digging four holes (each two feet deep with a 12” diameter). Mark your holes first and then measure diagonally to ensure that each post will be an equal distance apart.
Step 5: Set posts and pour concrete
Using your 3-foot level, set your posts (4×4 x 8” boards) and brace them so that they stay in place while you pour your concrete. Mix your concrete as you work in your wheelbarrow. You’ll need about eight 80-pound bags to fill the four holes. When filling, leave an inch of space between the concrete and the surface. Your concrete will expand as it dries, and this will prevent it from coming over the top of the hole. To eliminate any air pockets, you should also mix the concrete in the hole before moving on to the next hole. Once all holes are filled, you’ll need to wait a full 48 hours for the concrete to dry.
Step 6: Install support beams and rafters
Using your circular saw, cut down your posts so they are all an equal height. Then attach two support beams on each side of your pergola with screws (your beams will take on the weight of your rafters and keep your structure sound). Next lay your rafters (8’ x 2×8 boards) in place atop the beams, spacing them accordingly. Attach rafters with screws and then permanently secure the beams with bolts.
Now that your pergola is built, you can be ready for your next outdoor party!
At The RTA Store we help make your dream kitchen a reality with RTA (Ready To Assemble) and Pre-Assembled kitchen cabinets, and accessories with the same (if not better) quality you would find at retail stores but for a fraction of the price. Stop by our website today!